Illustration by Christina Hendricks.
Community: the condition of sharing or having certain attitudes and interests in common: ’the sense of community that hashtag classrooms can provide (remixed from Oxford Dictionary definition
Last Friday Jim Groom and Martha Burtis gave a presentation titled ‘Open is as Open does’ exploring the pedagogy of DS106. A key take away for me was the title of this post. DS016 is not a MOOC it is an OOC that focuses on community building.
I have issues with using the word community as so much academic speak has been written about what it does or does not mean. What was lovely about how Martha and Jim use the term, is that they use it in its common sense meaning – without creating complex narratives about what it does or does not mean. I like that. I went back to the dictionary and found its common sense definition. DS106 is certainly ‘the condition of sharing or having attitudes and interests in common’. I am happy that I belong to the DS106 community and that it is an open online course. No frills. Open is as open does.
The rest of this post is about what an OOC can mean in action with animated gifs examples. What could be more important?
My weekend started on wednesday with this Tweet from Michael.
The tweet refers to this type of amazing gifs Michael has been creating:

To some this 140 character may be forgettable, to me it was a tutorial from somebody whose skill at creating animated gifs genuinely admire. So I decided I would focus on this at the weekend. I started with the ‘find a fast cut of video 6-12 seconds’. Clearly having led a more sheltered life than Michael, my mind went to the film ‘The Artist’ which has a little Jack Russell dog called Uggie as its star. I thought I might find a moment with Uggie doing one of his many tricks to try the technique, and I was curious what would happen with black and white film. I went searching for my moment.

What was really interesting here, was how I processed the frames on the film clip differently. When you look for 6 to 12 seconds of film your attention goes to the question: where is the essence of the motion? I worked out that you focus on the moment of change. In this case from Uggie lying down to him getting up. I was pleased with the output above – it was smoother than other gifs I have made and caught the exact moment I wanted really well. Time for the next step.
When I read the tweet again I noticed ‘fast cut bit’. Hmmm. What on earth is fast cut bit? I went looking and found out that Uggie just would not do. He was not fast cut, poor darling. But I was hooked on Uggie’s gif and I also realised I did not know what Michael meant when he said ‘throw out as many frames as seconds’. Did he mean include in final gif as many frames as seconds (this is what I thought it meant at first) or did he mean delete as many frames in each second as the total number of seconds – if a 12 second film, throw out 12 frames per second?
This shows up an interesting element of learning online, we use what we can and are very aware (at least I am) that those part of the DS106 community give their time freely online and have busy day jobs. I try to not ask for help unless really stuck. I felt I needed to try both options first and then if I could not work it out, contact Michael.
Ahh! but there was that other technique to try – there is always another technique to try – the white lines to create depth and a 3D effect on animated gifs. There had been chat on the DS106 hashtag about these gifs and they did look cool.

I went looking for tutorials and found a great one that also had a .psd file of the lines so that you could see how the whole thing was done,
I watched, got sick of the Japanese pop soundtrack, watched again. Spent hours trying to get it to work and failed. For the sake of helping others I will post my crappy attempt here <hiding head in shame, should know better>
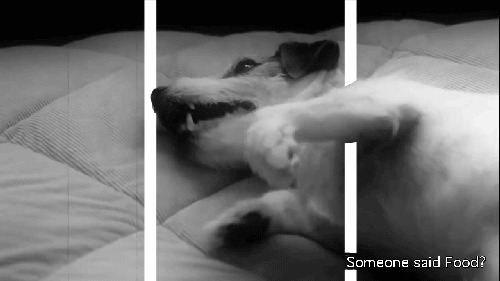
I call it the ‘bad-Uggie-Gif’. I spent hours, deleting bits of white lines and finding that it just did not gif with the white lines added. Some peculiarity of the template I used I imagine. I so wanted to make it work, I asked Tom Woodward, another ‘animated gif whizz kid’ in the DS106 community, for help. He said he would try if he could, and he did.
I cannot stop looking at it! I think he deleted quite a few frames as well as changing the direction of the lines. I don’t know if he uses Photoshop or anything about how it was made. I always download and load into Photoshop to answer as many questions as I can about them. It would be better if i could have a chat and ask – this way is slower but arguably I learn more as I experiment with what others make. I thanked Tom for his gift on Twitter and he responded,
I will make the darn lines work. I now have a lovely Storify made by another DS106er, Rochelle Lockridge, that pulls our conversations together.
And I still need to get back to that original tweet from Michael and learn the altered state gif technique. I may need to find a different film genre to find my fast cut film clip to attempt it. Yes, DS106 never ends, it is #4life and cult deprogramming is expensive!
Want a ‘business model’ for your MOOC? Remember that open is as open does and that is about attending to community not counting beans.
_______
Update
The conversation continues on Twitter. I learnt that the z axis was compressed on the Uggie clip and this made it harder. I saw a few more awesome examples. John Johnston posted an awesome gif and a link to a great post on how to use Fireworks to get a good gif. He also posted an example of how the effect is used on film.
It looks like depth of field matters and picking the right clip in the first place.
And the lovely Talky Tina has created some beautiful posts mixing, planes and pancakes and guessing games to help us understand the idea of depth more. You can find the first one here and the second one here. The lovely Tom Woodward has also put virtual pen to paper and has made some great diagrams to help explain depth using Tina’s pancakes. If I cannot get my Uggie to 3D with all the resources in this post – then I ought to be banished from DS106. Watch this space.