DS106 on the couch

Month: September 2013 (page 1 of 3)

Saying like peanut butter this morning. I worked on the part of the assignment that asks to ‘make sure the movement is minimal but essential’. i am getting the hang of deleting non-essential frames. Definitely better to be animated than un-animated! Used both photoshop and Gimp. Gimp to get the rough animation and Photoshop to get the detail and the frame speed right. Film clip from Buñuel again.

If anyone needs some guidance to start giffing – a great post by a new recruit here and you will also read details of DS106’s collaborative animated gif project in his post.

It all started with Buñuel

A gif was posted on the DS106 community just for fun. Some of us got interested and made suggestions about how to turn it into a cinemagraph. I have been wanting to learn how to do this for a while. Here is the result of many days and many tools:

image

This post is a stab at describing what I did and what I learnt, as a way to sum up and reflect on visual week 5 on DS106.

The original gif was made from a clip of a film by Luis Buñuel, I am not sure what was used to produce it but it was not optimised for animated gif on an editor and it would not load on Tumblr as an animated gif. I downloaded and opened it in Gimp. The gif was 19 frames, running at 100ms. The size was 506 x 285 and 12.1MB. 

What interested me was the idea of turning it into something like this. It meant I had to learn how to keep everything still in the image except the area I wanted animated. I did not have a clue how to do this. I knew it had something to do with masking, and that Gimp should do it. I tried this tutorial, but as Christina Hendricks says in the blog post on this, the tutorial is helpful to understand masks but not so helpful in teaching the specifics. I contacted Andrew Forgrave on Twitter and he directed me to his instructions. They were helpful but the most helpful thing was that he directed me to a screencast by Jim Groom that explained more detail I was missing. Christina had also found both of these guides and was able to produce a great animated gif from both of these in Gimp. It should have worked for what I wanted to do too. I spent hours in Gimp, creating masks learning about how to work with them. I simply could not get this to work. It turns out, a key thing in Gimp is 

I ended my day frustrated and deleted everything I had done. Mistake. I had reduced layers to 10, aligned frames, and done a lot of preparatory work that I could have used later. 

I started again the next day with this tutorial:

This was very helpful and showed exactly what I wanted to do. It did however, assume that I knew about guides, aligning multiple frames, and then it explains the process really fast so I had to listen very carefully. But at the end of this attempt – several hours, several tutorials, several trials – I had a kind of cinemagraph. It was not quite right but I was pleased that I had learnt how to use Gimp to make this type of animated Gif as it was something I wanted to learn how to do well. My taste still impeccable but not yet matched by my ability to execute, as Ira Glass reminded us the other week. Other DS106 participants came to my rescue making suggestions about how to improve on my efforts. Even if my attempt was described as ‘slightly creepy’ I could see I was on the right track.

I have been thinking for a while now that Gimp is not the most user friendly bit of software. Christina put it well:

It has many non-intuitive elements and I am an old hand at learning difficult software. Quirky might be a kind of way to describe it. Flexible, might be another as it allows the user to set many parameters and does not assume what user may want to do. You have to set everything. Take the example above. The reason you apply the mask after you have added it, is that you might want to save the mask for future use. You want the mask clean to use on a new image. Makes perfect sense once you know how and why. Personally, I think it was designed by aliens and I have not managed to warm to it in spite of many tutorials and tries. It was time to test Photoshop. 

One hour in Photoshop in an effortless and enjoyable fashion I was able to implement all the suggestions that had been made and posted the final version above on google plus. I loaded the image – I was able to crop it easily selecting all the layers. Select blur tool, zoom it, use it at 50% blurring to blend the eyes in all the layer. Watch the animation without having to squint or select more commands than any sane person needs to select, over and over again. Easy. Optimise for web in a couple of strokes and off to lunch with a job well done. 

I have learnt a number of things with this cinemagraph attempt. Software and user need to gel if we are to create with it. Getting frustrated with too many keystrokes or a non-intuitive design is not conducive to creativity. Choosing the right software can make the difference between useless and thrilling. I am thrilled that I have made my first cinemagraph, I felt useless with my Gimp attempts. I thought I would never be able to engage with this fascinating medium, but after my Photoshop experience I know that if I suck, it will not be about the software but about my talent or lack of it. This stuff takes time to learn, and we need to ask for help when we are stuck. 

I recognise that there is a cost issue here. I also know that at the time of writing (September 2013) Adobe are offering a 30 day free trial which if timed properly might well enable DS106 participants to learn the tool and use for most of the course for free. There is also an educational discount. I don’t want to sound like a paid advert, but the experience was day and night for me at least. Another DS106 participant made this comment:

Nice job! I had a similar elation when I moved from Photoshop Elements 11 to Photoshop CS5. Not having to merge layers, easily adjusting animation frame rates for individual layers, and previewing immediately allowed me to be so much more creative as well as save time. Let the fun begin!

Let the fun begin, indeed. There is no holding me back now – I shall animate the world, as I agree with  Andrew Forgrave when he says:

There’s nothing like being animated! It sure beats being unanimated.

I thought it would be nice to make a nice #ds106radio bumper for all my True Friends to hear when they are listening to #ds106radio and are waiting to hear my voice. When they hear this bumper, they will hear my voice and it will be like a little snack for them until they can hear my voice again.

A quick gif post-secret assignment for Rochelle and her Salon Participants. The dream is to self-build my next house. The tree house to illustrate my building skill levels. Briefly played with existing gif in Gimp. 

2013/365/268 Down the StairsCone BluesLooking down on FallBlue

mdvfunes’ favorites on Flickr, click on the link to see them all!

My favourites for this week. It was a great pleasure to view everyone’s photos. I followed this link and everyone who had tagged as per our assignment came up! I left comments on Flickr. Dave Barr did not show up on Flickr but I wanted to add my favourite of his to this post too.

And Sandy’s storms deserve a mention too – I love those photos! Why? they create a mood and I can almost smell the rain. 

Photos by fiedegufei, cogdogblog, Rockylou and karenatsharon

Creative Macro Photography with Brian Peterson

Well, I have no idea who this guy is but I figured that if he was included in our resources he must have something to say that might teach me how to take a decent photo. So I watched the video and was not very impressed. Still, I persevered and watched it several times as i wanted to take a key tip and try it for myself. First, a caveat, I am a complete beginner and whilst I have always wanted to learn to take good photos each time I approached the subject I have been met by people who disappear up their backside telling me how only special people get to be photographers and only if their zoom is long enough. The title of Brian Peterson’s video falls in this pretentious category, I am afraid. Still, I persevered. He turns out to be anything but pretentious on the video. It shows how to use simple tools, and a light reflector to play with light. I learnt about warm and cold light – yellow or white reflection. It is not the thing that you are photographing but how you attend and play with light that makes the difference. This interested me. When I take a photo I am always thinking about how interesting the subject is, not what the light may or may not be doing. So, I had my tip to practice with: use a light reflector to play with the light. 

I decided to do a 15 minute photo-blitz. Found a corner in the house where the sun was coming in, made a cold light reflector from kitchen foil and a piece of cardboard and got some props. I used my iPhone and the Camera+ app, reviewed the tutorial I am using to learn the app and started to play with light. It turns out that you can separate focus and aperture (get me using fancy words I don’t understand) in Camera+ by clicking on the plus sign on the screen. I read that where you point the aperture will determine the overall light you get in your photo. I thought I would play with this. I do not understand it enough to explain it, but I can now use it to play with light a little. 

Here is my first try:

image

I then started to play with my kitchen foil reflector, the focus and aperture settings on Camera+ and after a few attempts, I managed to get this:

image

We were asked this week on DS106 to pick our ‘best’ photo. Well, this is it for me. I have never before managed to take a photo with light reflecting off an object without the photo becoming unusable with too much light. This simple photo made me feel pleased as punch. I had a desired outcome in mind and the result was almost exactly what I envisaged. The sunlight was photographed without too much glare.

I am reminded of the feeling I get when I play a good golf shot – when what I imagine matches what actually happens and that keeps me going through the next 10 crappy shots.

Thank you, Brian. I learnt something. But you really need a haircut and better locations for your videos – and yes, I got the point that he was trying to find beauty in the ugliest possible setting. 

A day out in London with DS106

September 25th, 2013. The day that I understood the subtext of Ds106.

What we do as assignments shift our frames of reference and can change how we relate to the everyday. I do this through meditation and writing and now I am learning to do it through other channels. What a joy!

Settle down with a cup of tea, as I want to tell you a story that explains what I mean.

It all started as a normal work day – I was travelling into London to run a class on cognitive linguistics and its use in business communication. I had planned to prepare on the train so I had my papers and my iPhone with me. As I got on the train, I remembered the PhotoBlitz assignment. I had to prepare for class but who does not have 15 minutes in a day to take a few pictures? I decided to do it from memory and on the train – it did not bode well as far as quality output is concerned. Still…

I had just read a fabulous tutorial on Camera+ which I had decided to use as my only camera this week, and I had that with me. I had just learnt how to take a screenshot of iPhone – so time stamp was easy. 

I ignored my internal dialogue as it kept saying there was not point and there was no time to create anything decent. I just got on an did the work. 

Here is a short Puppet on the raw output – but that was the least interesting thing about the assignment for me.

As the train came into London Victoria and I was running a little late I decided to take a cab to the venue. London cab drivers are always a joy to chat with and I always make time to engage them in conversation rather than get lost in my digital echo chamber. This one did not disappoint. I found myself remembering audio week and wondering if there was an app that would allow me to record the sounds of London – it was such an wonderful conversation. What was of note for me was that I was noticing the sounds in a new way.

I found myself telling the cabbie (this is how we affectionately refer to taxi drivers in London) about DS106 and within minutes I was in a new dimension. I told him about the assignment, he loved photography and it tickled his creative bone. Here how he would have done it:

  1. You could do 15 minutes through London. There is the London Eye, Parliament, National Gallery, a post box, that woman on the bicycle. You need to get things from funny angles.
  2. You could stand by the traffic lights and get photos of people as they approach the lights. You know catch the different emotions. Some just miss the lights and get angry, others are patient, others smile. In 15 minutes you could do capture really interesting faces. these day, though, you might have to ask permission. We have to ask permission for everything, annoying though it is.
  3. Controversially, you could find the local fire station and spend 15 minutes photographing the picket line. yes, firemen are on strike all day today. That would make a great 15 minutes.

Am I the first to have recruited a cabbie to DS106?

As we talked I kept getting more and more excited by the amazing possibilities of what had seemed just a chore to be done 30 minutes before. We talked about how photography is about looking at your day to day in new ways not about turning it into a chore that requires extra time. You can always find amazing perspectives if you look, he said. We arrived at the venue, I wanted to stay in the cab and go on a photo-blitz with my cabbie rather than go in and teach. 

It did not end there. My class was different, I noticed that when I teach I am the medium for the ‘stories’ I tell. I paid less attention to content, hell I know the content by now, and more attention to how I talked about the content. Variation in my own voice, presence, engagement in the moment. Use of my visuals as more than decoration on a slide, but a way to convey more stories. I had fun and (I think) so did the students.

On the cab back to the station, another great conversation but this time in contrast to the first one. I also wished I could record and make an audio story. This cabbie was no techie. He had broadband only for film streaming on a TV and a computer that lived in the cupboard under the stairs because ‘his friends were around the corner, not on Facebook’. 

I got on the train back home, with a new perspective of what it is I am learning on DS106. Life as improvisation, composing a life through the stories we tell in each conversation we have. So I decided to experiment with the editing functions on Camera+ on the way back home. 

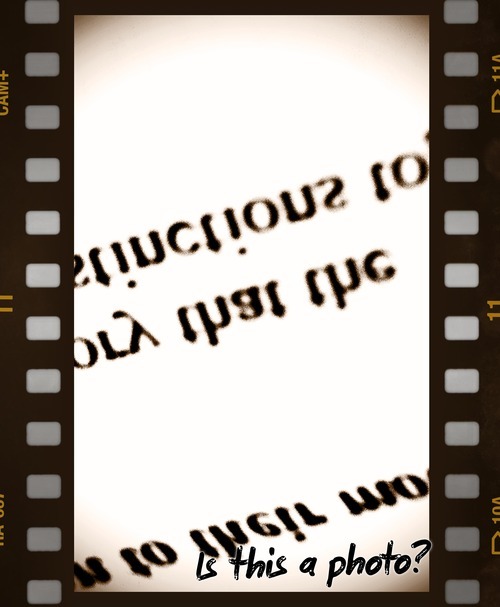
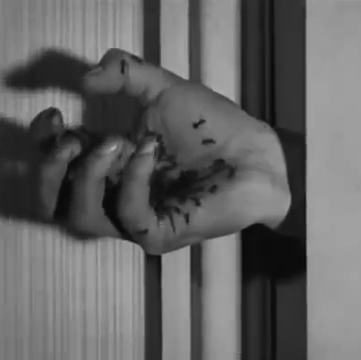
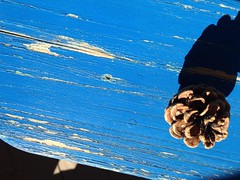
I remembered one of the suggestions on the weekly tasks was to make a photo look like not-a-photo. I picked the most boring photo from my blitz earlier and ended up with photo above. It will not be snapped up for the next national exhibition any time soon, but it taught me something. I learnt to use some of the effects on Camera+, I learnt to look at a photo I might have deleted differently, a little about light, I finally get what aperture means and what it does….but most importantly, the internal dialogue had ceased. I was in the flow of the activity with a quiet mind. Meditation by any other name. 

A perfect day out in London with DS106. 

A proper Podcast has been achieved

….But not to be viewed by anyone!

I followed this tutorial and it worked beautifully. It is old and it reminded of the loss iWeb (which brought a tear to my eye) but it was clear and it worked. I made chapters, I added photos, I took time to add URLs for each chapter for ease of reference as well as a title and once it uploads to SoundCloud you lose all the extras. 

As you expect from me now, a failure first. I tried to remix the podcast in Audacity – the plan was to produce the second version in Audacity to compare both. I am afraid, even after listening to Alan Levine’s tutorial, downloading all the software and producing a decent file – I abandoned it because I could not visualise what I was doing as easily as I could with GarageBand. So, I have it and can now use it but plan to continue to learn GarageBand as my editor of choice as it feels more intuitive to me.

I have remixed the podcast I posted last week, the content is the similar but you can actually hear it all more clearly now thanks to Rochelle and Christina’s awesome tips in their latest video.

I have learnt how to produce a podcast with extras which I will be able to share as soon as I workout how to get it from GarageBand to the Web without iWeb and with its chapters and photos intact. Meantime, you will have to trust me that each chapter, had a title, its own photo and a link to the clip it referred to. I thought it would make a great resource. 

I am curious to hear if you listen to both, what you think of each when you compare them. I think this one is more usable, more professional but the other one is more surreal and ‘RadioLab’.

At least this time I did what I wanted, even if file type conflicts do not allow me to post it. If anyone wants to see it, leave me a comment and I can share the GarageBand File on Dropbox.

Okay, now I move on to telling stories with photos 2 days late. Oh! but wait there is no late in Ds106, just 4 life and no sleep. 

Sound is like touch at a distance

I cannot even begin to talk about how I produced this monstrosity ( is that a word?) I has taken hours and hours and more effort than just writing a weekly summary for sure. I was happy with the content…but at some point I clicked ‘give me awesome echo now’ and did not notice. It was not intentional and I cannot find a way to get rid of it in Garageband. I noticed that the different clips in the podcast were not levelled. I downloaded the Levelator and hoped to even different volumes in the podcast, but it was not to be. It turns out it does not take mp3 files. 

I set out to make my first podcast and have done it. It is an example of the great gap that exists between my impeccable taste and what I am able to produce as a beginner. Still, I got practice with Garageband, Quicktime, Soundflower, Levelator, and got to listen to my ‘nuggets’ for the week a zillion times as I tried to put the podcast together. Here is wishing the next one will be easier.

Awesome! Just discovered RadioLab and this talk is something I will want to go back to. Don’t talk about stuff, be the stuff. Inspiring and humbling all at once.

Olderposts

Copyright © 2024 DS106 on the couch

Theme by Anders NorenUp ↑